
Transform Your Pumpkin into a Work of Art - DIY Decoupage
Pumpkin season is here, and this year I gave a plain craft pumpkin from Michael’s a complete makeover using one of my favorite napkins from our shop: the Traditional Fall Leaves Napkin. With a few simple supplies and some creative touches, you can transform an inexpensive pumpkin into a one-of-a-kind autumn centerpiece.
Click here if you'd like to watch a quick video of me making this pumpkin on my Facebook page.
Supplies You’ll Need
- Craft pumpkin (mine came from Michael’s)
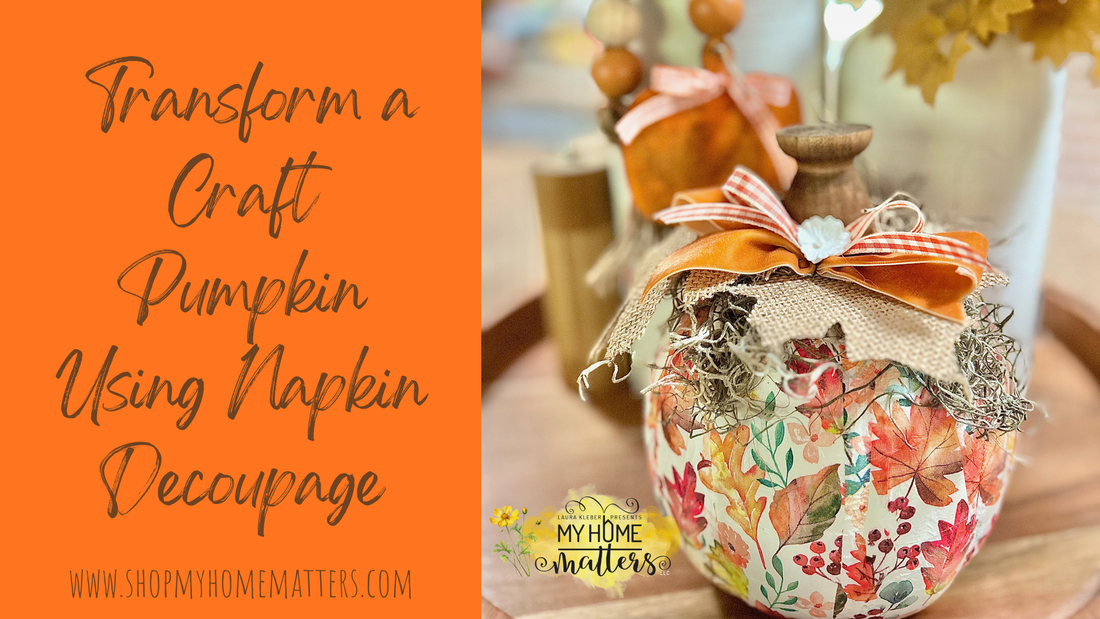
- Traditional Fall Leaves Napkin (from Napkin Bundles Collection)
- Wooden egg cup (I had this lying around- I stained mine in Early American)
- Burlap leaves (mine were from my stash, Hobby Lobby is a good source)
- Moss
- Mod Podge
- Ribbon (two different coordinating styles)
- Tiny paper flower
- Twine
- Hot glue gun & sticks
- Heat gun (optional for drying)
Step 1: Prep the Pumpkin
Cut your napkin into strips and separate the top printed ply from the backing layers. Working section by section, brush on about a 2-inch strip of Mod Podge down the pumpkin. Gently lay a napkin strip over the Mod Podge and smooth it into place.

Continue working around the pumpkin, overlapping strips slightly until the surface is covered. Fill in any small gaps with extra pieces of napkin.


Step 2: Seal the Napkin
Once the pumpkin is covered, brush a coat of Mod Podge over the entire surface to seal and protect it. I used a heat gun to speed up the drying process — just be careful not to overheat and melt the pumpkin!

Step 3: Add Moss & Leaves
Hot glue a layer of moss around the stem at the top of the pumpkin. Tuck in a few burlap leaves to add texture and give it that rustic, natural look.

Step 4: Create the Stem Accent
This part is optional but I wanted my stem to stand higher than the moss. So I flipped a wooden egg cup upside down, stained it in Minwax Early American (or your favorite finish), and hot glued it to the top over the moss and burlap leaves. This created a unique, dimensional “stem” that made the pumpkin really stand out.

Step 5: Embellish with a Bow
Cut two coordinating ribbons — one wide, one narrow — and crisscross them to create a bow, layer one on top of the other and then tie them together with a bit of twine. Hot glue the bow in place, and finish it off with a tiny paper flower in the center.


Display Ideas
- Rest on a floating shelf as a seasonal accent.
- Place on a small cake stand or riser for a centerpiece.
- Pair with smaller pumpkins, candles, or fall garlands for a styled vignette. Mine is on a tray on our island.

Final Thoughts
I love how this pumpkin turned out — rustic, colorful, and just a little whimsical. Best of all, the napkin design gives it a vintage-style charm that ties in beautifully with fall décor.
If you give this project a try, I’d love to see your version! Share a picture and tag me so we can celebrate your creativity together.
