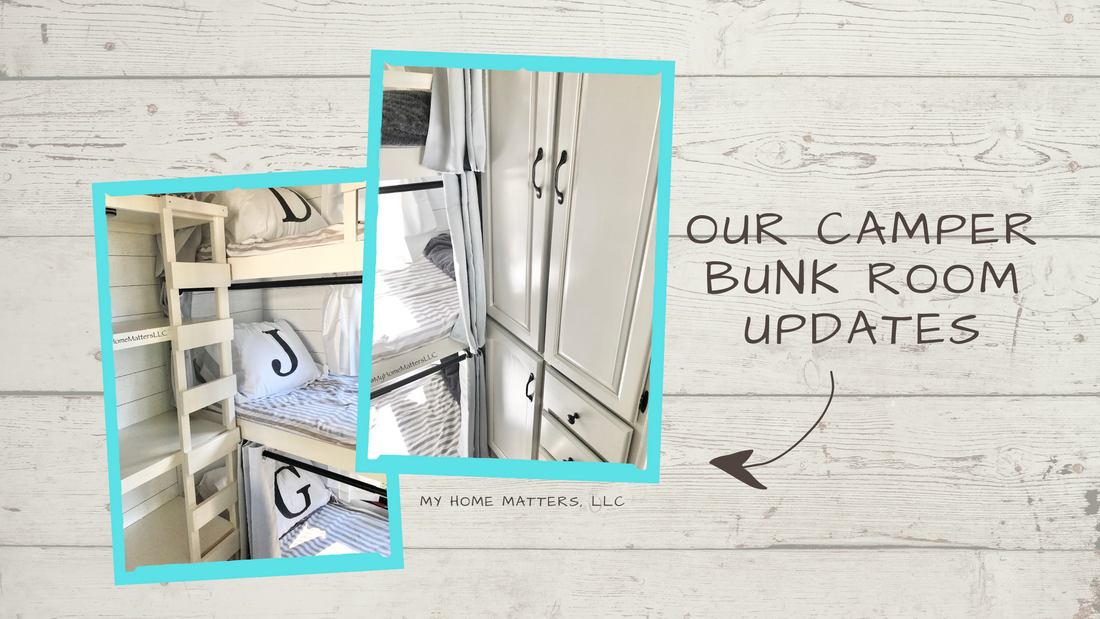
Our Camper Bunk Room Updates
As you may know if you follow me on social media, the renovations to our camper at the lake are coming along. This week I'm sharing the updates done on the kids' bunk room space! We've had this camper for about 12 years now and finally the kiddos have a ladder and a space for their bags.
I thought long and hard about how we could bring more functional storage to this space as well as a way to reach the top bunk. This room does not have a slide out and a hallway takes up about 3 feet of space right outside of the room. So, that means you literally walk in the door and have about two feet before reaching the bunk room beds.
I had a plan in mind and sketched it out for my husband and he agreed to help me. First, he and my son removed the corner cabinet that served no purpose except for as a phone and device drop zone. There is a storage cabinet and three drawers BUT the only time the kids ever unpack is (maybe) when we stay for an entire week of vacation in the summer. Otherwise, they need a spot to just drop their bags and get to enjoying their lake time. The first step towards reaching this goal was to remove the corner cabinet.
The cabinet served as the cover for all of these wires behind the fuze box, so we had to incorporate these as well.

Our plan was to start the first shelf high enough off the ground to do so. We calculated about how much height each kiddo needed for a bag and measured the rest of the shelves out from there. In order to not take up more bed-making space, I wanted to make the ladder part of the shelves. My gracious husband did most of the cutting at home and then there was less to do on installation day. (However, it still took the majority of a day!) Mr. Home Matters created a cover for the floor level exposed wires so that you can't see them and another cover for the inside side so that the bottom bunk kiddo does not have to roll over and look at them either. We did need to add holes/venting for safety for air flow around that unit.


Amazon is amazing in terms of finding just the right items for a camper! I found duvet covers with this stripe pattern and still have to add the very thin inserts to keep the bulkiness down. To avoid having yet another pillow in their already small spaces, I painted a thin white pillow sham with each initial for a little personalization.

And, since one kiddo feels much better with a light on and two fight tooth-and-nail for total darkness, the compromise was a set of puck lights. I found a six pack of lights that run on batteries, change colors, stick on with adhesive, have times for on/off times, and have remotes! The pack of six was perfect - one to shine light on each shelf/bag in the dark and one for each side panel of their bed area.
The icing on the cake for privacy was the addition of some black out curtains with grommets that slide across a tension rod. It does still let some light slip in but when all three are closed, it really narrows it down.
Before we decided to do all of the camper updates, we really didn't have any other way to keep the kids safe than to continue using the baby railings we've had for a long time. I've hated those things because they take up more than I'd like and are super cumbersome. At this point, middle bunk kiddo didn't need/want one anymore. And our top bunker needed something that wouldn't feel closterphobic. (We also didn't want a trip to the bathroom in the middle of the night to be a pain either.)
Originally, I left the hardward in the bunk room as it was, in brushed nickel. However, once we added the tension rods for the privacy curtains, it just felt like they were calling out to be dark. I used Rustoleum's Burnished Amber to spray them and now, it feels right.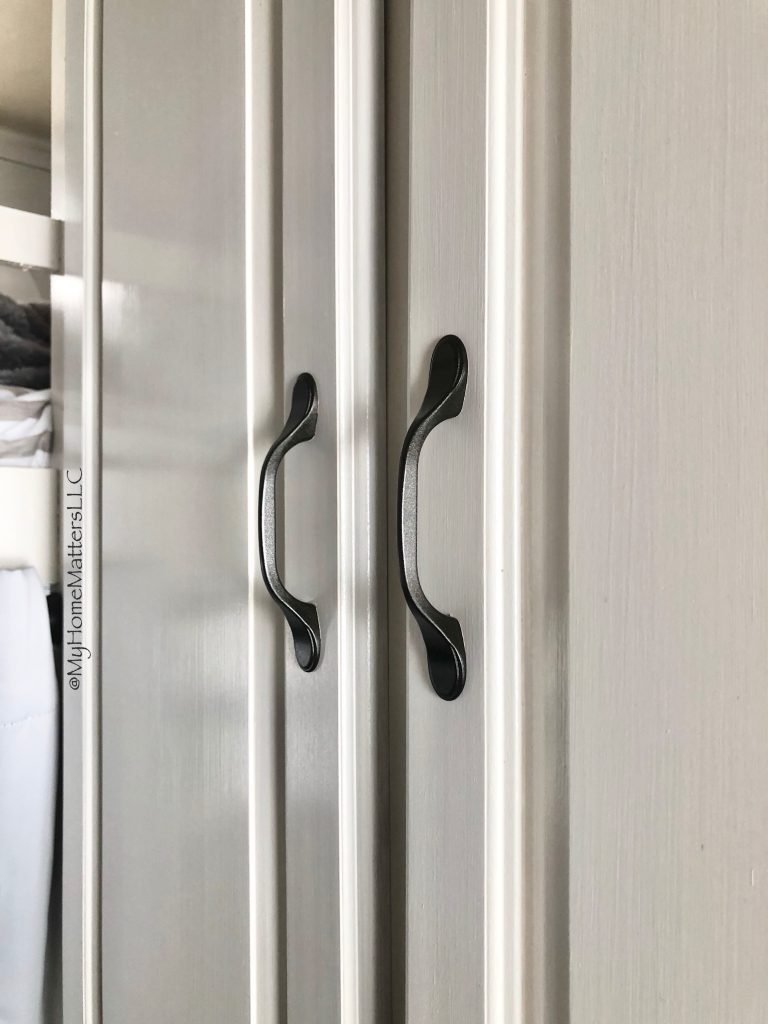

The curtains on the windows are also black out curtains on a cafe rod. The entire space feels so much brighter and functions so much better! They even have an extra shelf that is the perfect spot for them to each have a jar for their beach glass. The final detail is to finish off painting the door trim and door.
I rolled over onto a paint can lid while painting in the middle bunk. Mr. Home Matters had fun telling the campground neighbors how it went right through the rear end of my paints all the way through to my skin! But, it was worth it in the "end". Pun intended. Ha! And, you can see the thrill on my face while squeezing myself into the top bunk!

At one point, one kiddo wanted to take a nap after fishing and... if he couldn't sleep in his room, he found a way to sleep in his bed anyway!
Hope you enjoyed this episode of our camper reno! More is on the way!
Out with the old cabinet...
I thought long and hard about how we could bring more functional storage to this space as well as a way to reach the top bunk. This room does not have a slide out and a hallway takes up about 3 feet of space right outside of the room. So, that means you literally walk in the door and have about two feet before reaching the bunk room beds.
I had a plan in mind and sketched it out for my husband and he agreed to help me. First, he and my son removed the corner cabinet that served no purpose except for as a phone and device drop zone. There is a storage cabinet and three drawers BUT the only time the kids ever unpack is (maybe) when we stay for an entire week of vacation in the summer. Otherwise, they need a spot to just drop their bags and get to enjoying their lake time. The first step towards reaching this goal was to remove the corner cabinet.
Wires for days...
The cabinet served as the cover for all of these wires behind the fuze box, so we had to incorporate these as well.
Our plan was to start the first shelf high enough off the ground to do so. We calculated about how much height each kiddo needed for a bag and measured the rest of the shelves out from there. In order to not take up more bed-making space, I wanted to make the ladder part of the shelves. My gracious husband did most of the cutting at home and then there was less to do on installation day. (However, it still took the majority of a day!) Mr. Home Matters created a cover for the floor level exposed wires so that you can't see them and another cover for the inside side so that the bottom bunk kiddo does not have to roll over and look at them either. We did need to add holes/venting for safety for air flow around that unit.
The fun part...
Amazon is amazing in terms of finding just the right items for a camper! I found duvet covers with this stripe pattern and still have to add the very thin inserts to keep the bulkiness down. To avoid having yet another pillow in their already small spaces, I painted a thin white pillow sham with each initial for a little personalization.
And, since one kiddo feels much better with a light on and two fight tooth-and-nail for total darkness, the compromise was a set of puck lights. I found a six pack of lights that run on batteries, change colors, stick on with adhesive, have times for on/off times, and have remotes! The pack of six was perfect - one to shine light on each shelf/bag in the dark and one for each side panel of their bed area.
The icing on the cake for privacy was the addition of some black out curtains with grommets that slide across a tension rod. It does still let some light slip in but when all three are closed, it really narrows it down.
Baby rails be gone!
Before we decided to do all of the camper updates, we really didn't have any other way to keep the kids safe than to continue using the baby railings we've had for a long time. I've hated those things because they take up more than I'd like and are super cumbersome. At this point, middle bunk kiddo didn't need/want one anymore. And our top bunker needed something that wouldn't feel closterphobic. (We also didn't want a trip to the bathroom in the middle of the night to be a pain either.)
It's all in the details...
Originally, I left the hardward in the bunk room as it was, in brushed nickel. However, once we added the tension rods for the privacy curtains, it just felt like they were calling out to be dark. I used Rustoleum's Burnished Amber to spray them and now, it feels right.
The curtains on the windows are also black out curtains on a cafe rod. The entire space feels so much brighter and functions so much better! They even have an extra shelf that is the perfect spot for them to each have a jar for their beach glass. The final detail is to finish off painting the door trim and door.
This was not a fun project until it was time for the fun details!
I rolled over onto a paint can lid while painting in the middle bunk. Mr. Home Matters had fun telling the campground neighbors how it went right through the rear end of my paints all the way through to my skin! But, it was worth it in the "end". Pun intended. Ha! And, you can see the thrill on my face while squeezing myself into the top bunk!
At one point, one kiddo wanted to take a nap after fishing and... if he couldn't sleep in his room, he found a way to sleep in his bed anyway!
Hope you enjoyed this episode of our camper reno! More is on the way!
1 comment
Absolutely gorgeous. Love it