Meal Planning Made Easy
Share
Meal planning can make or break whether you and your family eat well or eat crappy for the week! Today I'm going to share with you my meal planning strategy that, while I have strayed from this for several months, makes it so easy for me! This post does contain a few affiliate links. What does that mean to you? It means that if you click on one of the products I have linked below and purchase, I will get a small compensation from the company at no additional cost to you.
So, I decided I would assign colors as follows.
I started writing the days of the week on the white cards.
Then, I moved onto the blue cards for main meals. We all have meals that we make pretty regularly. So, I simply thought about all of the meals we make most frequently and wrote them down. each on a separate card.
In no particular order, I then moved onto the croc meals we most often make and did the same. We're not fancy around here so, for the veggies, I simply put things like "green beans," "oil and vinegar cucumbers," "corn," and so on. Yellow cards got things like "on a bun" if it was hamburgers but, otherwise, you'll see the typical starchy sides like potatoes, mac & cheese, and rice. Of course, we can't forget the salmon cards for leftovers and dining out!
Now, we put our meal planning plan into action! For me, that means spreading the days out along the kitchen island and then filling in different colors underneath. What I like best is that these can easily be swapped out. I also made sure to include "breakfast for dinner" and "grilled cheese" as main meal options simply because sometimes I do tend to forget that these can be easy last minute fill-ins when youhave a change of heart (I mean when you forget to thaw the meat in time for what you planned). 
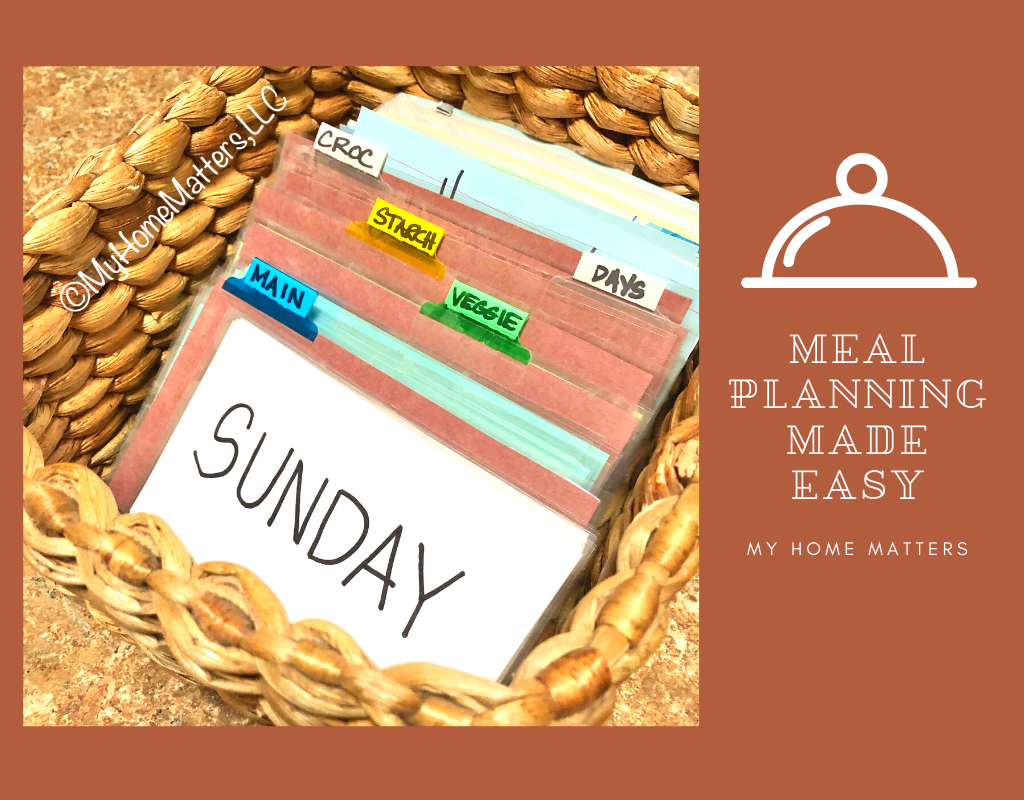
I created little dividers by cutting up old folders and adding sticky tab labels to each with the different categories so that I could keep the cards sorted by color. I didn't have tabs with every single index card color but I came close. Heck, you could even use little stick notes for tabs!
What I like to do is write the meal plan on a meal planning "chalkboard" that is magnetic and resides on our refrigerator. THIS IS BECAUSE I HATE THE QUESTION "What's for dinner?" This way, I can totally ignore whoever asks that dispicable question and direct them to the chalkboard. It also makes me accountable to pay attention each day to what the plan actually is. Is it foolproof? Umm... until they make me fool proof, no. As I said in last week's post, I've really let things go as things got super busy towards the holidays. But, if I take just five minutes to map out this meal plan each week, it really does make a difference. This is our meal planning board and I love it because it looks like chalkboard but is actually dry erase which, to me, is easier!
Oh, and I forgot to mention - you can note where a certain recipe is located by writing it on the bottom of the card. For instance, the meatloaf recipe I use is in a Betty Crocker cookbook. Several of our soup recipes are in another cookbook. This helps me to remember when the recipe may not be one we use often.
This method allows you to continually add to your stock of recipes! I'll add new cards to the mix periodically and then one day when I have several new cards, I'll get the laminator out and laminate them. Lamination is certainly not necessary BUT I will say that, since it make the cards "slipperier," they slide around more and are easier to separate. I LOVE having them laminated for this very reason. And if that's not convincing enough to consider it, maybe the fact they are much easier to wipe off an clean when they are laminated. So, for those of you who may think your surfaces are nice and clean, as soon as one kid leaves a water ring or a drip of syrup in the spot you lay down the nicely organized cards...trust me. You'll be glad you laminted them.


Here are some supplies you will need for your meal planning basket:
- a basket or index card holder
- white index cards
- colored index cards (I like these since there are five colors)
- sharpie
- OPTIONAL: a laminating machine
First, I deternined what makes up meals and it worked out to four categories.
- Main course (non-croc pot)
- Croc pot meals
- Starchy sides
- Veggetable sides
Then I determined what other "sections" I could use in my organizer basket, and there were two.
- Days of the week
- Leftovers
- Dining Out
So, I decided I would assign colors as follows.
- Blue = Main course/non croc pot meal
- Purple = Croc pot meal
- Yellow = Starchy side
- Green = Veggetable
- White = Days of the week
- Salmon = Leftovers (on the front) AND Dine Out (on the back)

Now, I didn't re-invent the wheel on this next step.
I started writing the days of the week on the white cards.
Then, I moved onto the blue cards for main meals. We all have meals that we make pretty regularly. So, I simply thought about all of the meals we make most frequently and wrote them down. each on a separate card.

In no particular order, I then moved onto the croc meals we most often make and did the same. We're not fancy around here so, for the veggies, I simply put things like "green beans," "oil and vinegar cucumbers," "corn," and so on. Yellow cards got things like "on a bun" if it was hamburgers but, otherwise, you'll see the typical starchy sides like potatoes, mac & cheese, and rice. Of course, we can't forget the salmon cards for leftovers and dining out!
And that's the hardest part!
Now, we put our meal planning plan into action! For me, that means spreading the days out along the kitchen island and then filling in different colors underneath. What I like best is that these can easily be swapped out. I also made sure to include "breakfast for dinner" and "grilled cheese" as main meal options simply because sometimes I do tend to forget that these can be easy last minute fill-ins when you

Now you have a menu for the week!
I created little dividers by cutting up old folders and adding sticky tab labels to each with the different categories so that I could keep the cards sorted by color. I didn't have tabs with every single index card color but I came close. Heck, you could even use little stick notes for tabs!

But what do you do with the cards once you've sorted them into daily meal plans?
What I like to do is write the meal plan on a meal planning "chalkboard" that is magnetic and resides on our refrigerator. THIS IS BECAUSE I HATE THE QUESTION "What's for dinner?" This way, I can totally ignore whoever asks that dispicable question and direct them to the chalkboard. It also makes me accountable to pay attention each day to what the plan actually is. Is it foolproof? Umm... until they make me fool proof, no. As I said in last week's post, I've really let things go as things got super busy towards the holidays. But, if I take just five minutes to map out this meal plan each week, it really does make a difference. This is our meal planning board and I love it because it looks like chalkboard but is actually dry erase which, to me, is easier!

Oh, and I forgot to mention - you can note where a certain recipe is located by writing it on the bottom of the card. For instance, the meatloaf recipe I use is in a Betty Crocker cookbook. Several of our soup recipes are in another cookbook. This helps me to remember when the recipe may not be one we use often.
Some final notes...
This method allows you to continually add to your stock of recipes! I'll add new cards to the mix periodically and then one day when I have several new cards, I'll get the laminator out and laminate them. Lamination is certainly not necessary BUT I will say that, since it make the cards "slipperier," they slide around more and are easier to separate. I LOVE having them laminated for this very reason. And if that's not convincing enough to consider it, maybe the fact they are much easier to wipe off an clean when they are laminated. So, for those of you who may think your surfaces are nice and clean, as soon as one kid leaves a water ring or a drip of syrup in the spot you lay down the nicely organized cards...trust me. You'll be glad you laminted them.


4 comments
Hello!
You should consider making a list of your main course, veggies, and starches to give others some ideas. I would totally appreciate it!!! ?
Hey Laura – what type of laminator do you use? Would you recommend yours? I’m itching to get one but don’t want to get one that is a hassle or doesn’t do a good job. Hope you were able to enjoy the BEAUTIFUL weather today!! :)
I have something similar going on !!! Color coded cards for categories , grocery list on back of card , a box to keep them in and a board to clip them on . ( I would much prefer a Laura Kleber stenciled board though )
What a great idea and so simple to implement!