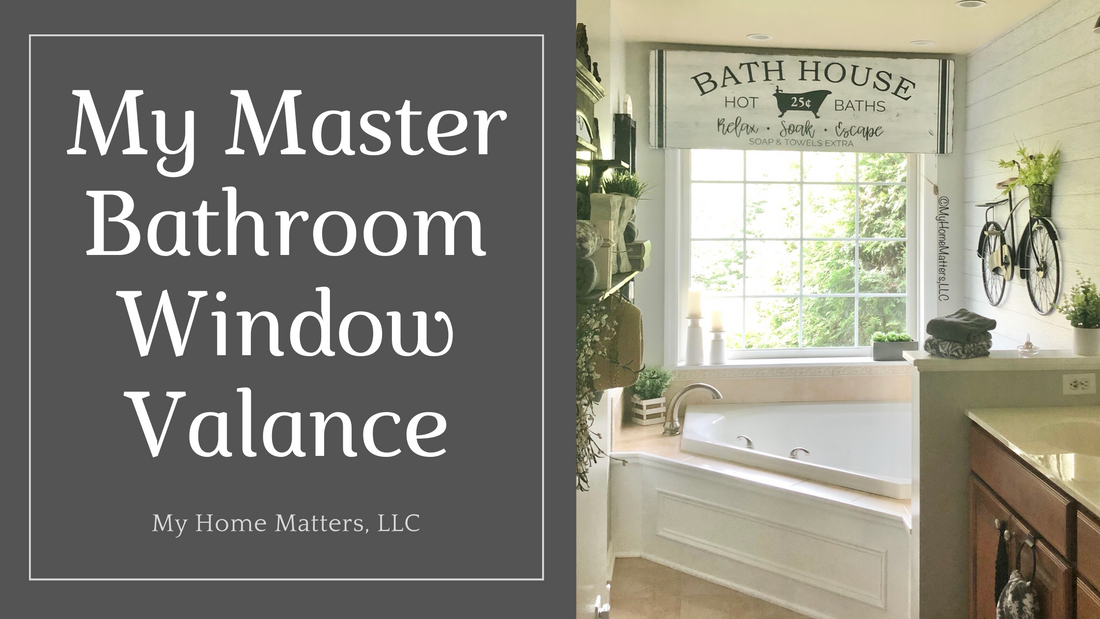
I Used a Sign as a Bathroom Window Valance!
I am just giddy over my new window valance sign! If you follow me on social media, you probably know that I've been on a mission this year to update a ton of spaces in our home. I have moved along to updating our master bathroom at the current moment. It's been over twelve years since it was painted. So, being that I just did our master bedroom, it seemed only logical to move into this space. I quickly settled on Repose Gray as our wall color as a means to change things up from my normal beige. It also allowed me to tie in the gray and black tones that I used in the bedroom. (You can read about our master bedroom updates here.) Here is a before photo...
I couldn't quite figure out what I wanted to do with the window. There is a blind that we usually keep rolled up and one thought was to just leave the window untreated for a cleaner, simpler look. After all, my goal this year is to simplify. But it wasn't sitting right with me. Something was missing. A spa-like feel is what I'm after in this room but I still need my bits and pieces of farmhouse decor to make it feel like home.
Lucky for me, Mr. Home Matters really has no opinion on these things and sometimes I realize I never even consult him. He just goes with the flow. Of course, one of my to-do ideas is to do a paint treatment to the tile floors and that's kind of big, right? So, of course that's something I do discuss with him But, otherwise, we're pretty much on the same wavelength - he really only cares about whether we can swing the cost. One night while getting ready for bed, I was staring at the window. Maybe a sign is what I needed and it could double as a window valance!
Time is of the essence these days as I try really hard to work on My Home Matters projects during the days and save my own personal projects for nights and weekends. We have a live sale this week and that means I had to be efficient with my time so that today I didn't wake up tempted to put off filling orders and making the new items just to finish my sign. I measured the space and determined I needed the sign to be 64 inches long by 20 inches tall if I wanted to "hide" the roll up window shade. Sometimes the stars just align and God puts everything into place. I knew I did not have wood that was 20 inches wide in what I now stock for custom orders and workshops. BUT... I remembered that I had one 6-foot long board stuck in the garage.
That piece of wood in the garage was pressed wood in a package. It's wood I hate using and took out of the mix for customs and workshops a while back for various reasons. I should have taken this piece back to Lowe's knowing I'd never use it. But sometimes things just work out - because it turns out this piece of wood I hate ended up becoming the perfect way for me to accomplish my goal and be efficient at the same time. So, while I paid for this piece a long time ago, it kind of felt like this project was going to be free now that I could find a use for it.
I measured and cut the board to size, sanded the edges and stained the entire thing black.


Once the board was dry,I put two coats of white latex paint over the stain (I let the first coat dry first). This pressed wood is so splotchy and requires a lot of sanding to eliminate that but onward I went...

My husband suggested I cut a board and screw it to the wall directly on top of the window trim. So, I did. I cut the board to 61 inches and screwed it into studs in the wall. This is what would hold the screws on which the sign would later hang.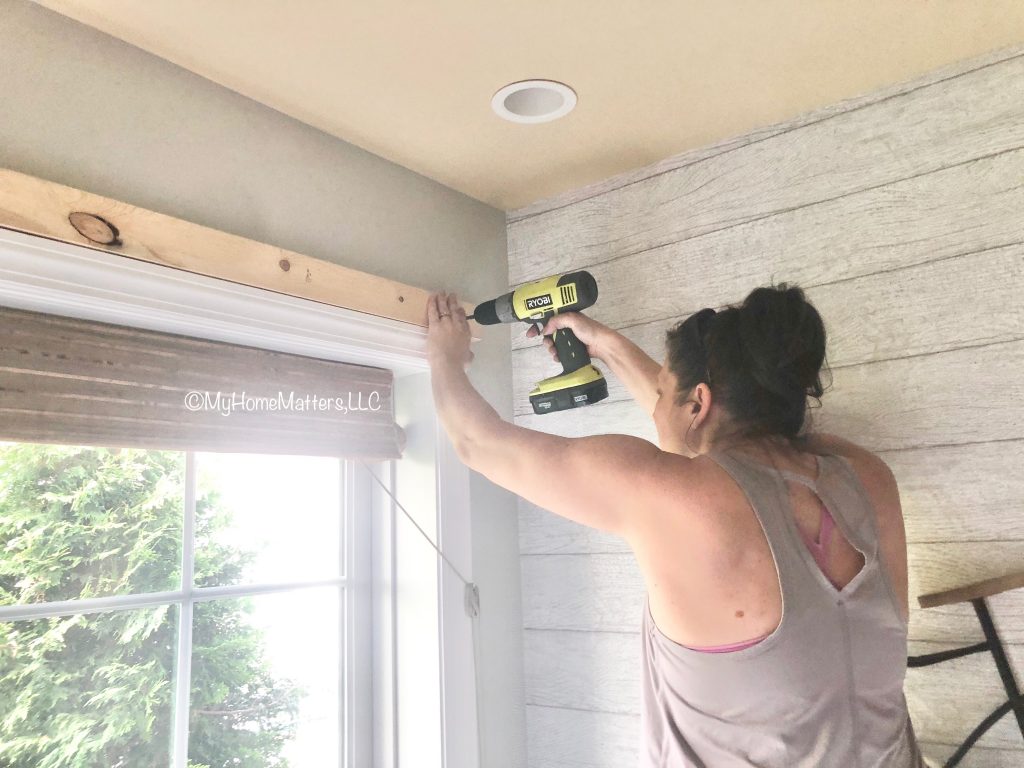
 Then he held the sign up while I marked out where the sign would need to go and then I went to work thinking backwards where the hooks would need to go. (This is when the trim got black marks on it from the stain on the back - my husband has a recent shoulder injury and holding it up had to be quick - so the trim needs re-painted but no biggie.) By this time, I was able to go back to work on the sign itself which meant it was time for distressing. I took 220 grit sandpaper over the entire thing with my electric sander. It was now ready for the stencil.
I created my own window valance sign stencil based on some bathroom signs I liked and printed. The more I accomplished with this project, the more excited I got! Since I already had added the hooks on the back in the spots I had measured, all I had to do was the painting.
  All that would need done after that would be hanging it up! So, once the stencil was painted, I measured out some grainsack stripes on each side to finish it off.
 My son wanted to help at this point (that's another way of saying he didn't want to go to bed), so he did a little touch up for me!
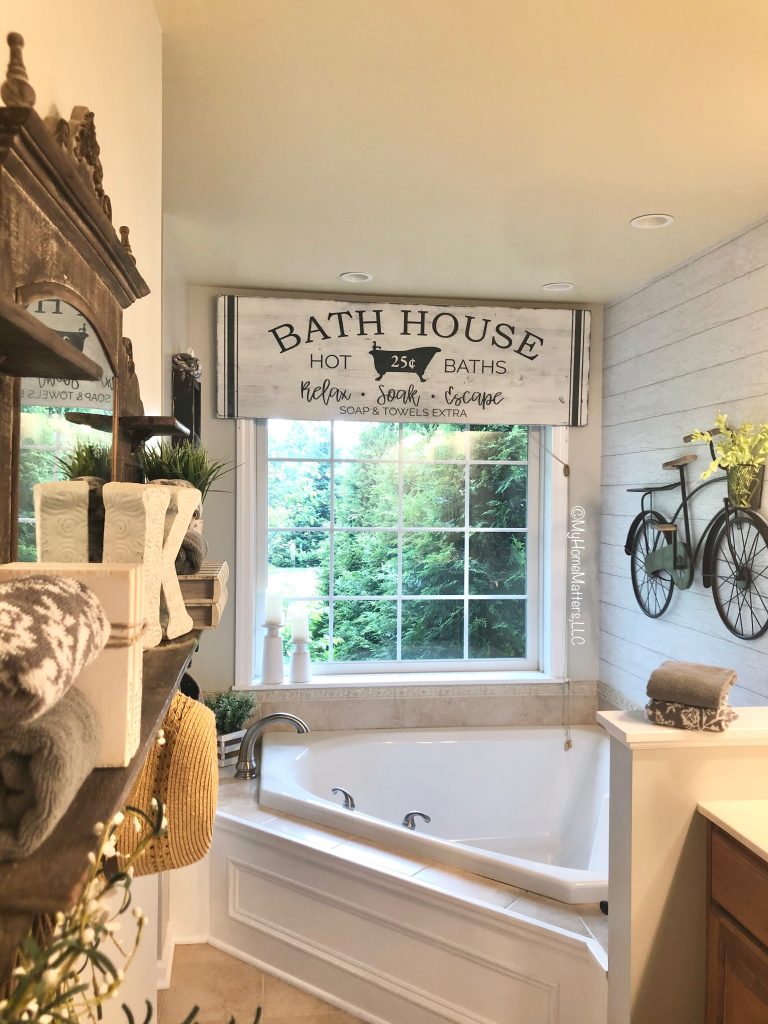
Here it is! With the exception of the fact that the trim now needs touched up again under the sign from us trying to position it just right, I just love it. It completes this space, gives me my touch of farmhouse and character, hides the blind and makes a statement as you enter the room. I've got some photos in both natural light as well as with the lights on...


Stay tuned for the rest of this project and make sure to follow me on Facebook and Instagram in the meantime! Have you ever used a sign as a window treatment? This is our second one - we also have one over our kitchen sink. But this bathroom one is one of my all time favorites! Do YOU and make your home matter to YOU! In other words, if it makes you happy, then who cares if anyone else likes it? Have a great week, everyone.
What I've done so far...
- I've painted the walls (except for the little toilet room).
- The light fixtures were changed out by Mr. Home Matters.
- Over the weekend, I got a coat of fresh paint on the baseboards and trim. (However, the window trim got messed up due to one of the steps in the process below...)
- The shelf unit that used to be in our entry way now lives on the one wall by the tub. It also got a new look with black paint.
- I moved one of my favorite pieces from the wall by the tub to opposite our vanities and darkened it up a bit.
- The silver and gold mirrors were replaced with round ones with black frames.
- A fresh new shower curtain and liner are up and have made a huge difference in the space alone!
- I removed the old curtain valance and rod.
- Peel and stick shiplap wallpaper is up and I love it! (Read about this wallpaper done in my entry and dining room here.)
- The cute wall bike I've had in storage for like two years FINALLY got a home on the wall by the tub. And it's perfect there.
- I've sold several pieces on our local swap site to help with the cost of the new items.
But something was still missing.
I couldn't quite figure out what I wanted to do with the window. There is a blind that we usually keep rolled up and one thought was to just leave the window untreated for a cleaner, simpler look. After all, my goal this year is to simplify. But it wasn't sitting right with me. Something was missing. A spa-like feel is what I'm after in this room but I still need my bits and pieces of farmhouse decor to make it feel like home.
Lucky for me, Mr. Home Matters really has no opinion on these things and sometimes I realize I never even consult him. He just goes with the flow. Of course, one of my to-do ideas is to do a paint treatment to the tile floors and that's kind of big, right? So, of course that's something I do discuss with him But, otherwise, we're pretty much on the same wavelength - he really only cares about whether we can swing the cost. One night while getting ready for bed, I was staring at the window. Maybe a sign is what I needed and it could double as a window valance!
Okay, the idea for the window valance sign was planted. Time to make it a reality!
Time is of the essence these days as I try really hard to work on My Home Matters projects during the days and save my own personal projects for nights and weekends. We have a live sale this week and that means I had to be efficient with my time so that today I didn't wake up tempted to put off filling orders and making the new items just to finish my sign. I measured the space and determined I needed the sign to be 64 inches long by 20 inches tall if I wanted to "hide" the roll up window shade. Sometimes the stars just align and God puts everything into place. I knew I did not have wood that was 20 inches wide in what I now stock for custom orders and workshops. BUT... I remembered that I had one 6-foot long board stuck in the garage.
Sometimes things just work out...
That piece of wood in the garage was pressed wood in a package. It's wood I hate using and took out of the mix for customs and workshops a while back for various reasons. I should have taken this piece back to Lowe's knowing I'd never use it. But sometimes things just work out - because it turns out this piece of wood I hate ended up becoming the perfect way for me to accomplish my goal and be efficient at the same time. So, while I paid for this piece a long time ago, it kind of felt like this project was going to be free now that I could find a use for it.
I measured and cut the board to size, sanded the edges and stained the entire thing black.
Once the board was dry,I put two coats of white latex paint over the stain (I let the first coat dry first). This pressed wood is so splotchy and requires a lot of sanding to eliminate that but onward I went...
Measurements are key!
My husband suggested I cut a board and screw it to the wall directly on top of the window trim. So, I did. I cut the board to 61 inches and screwed it into studs in the wall. This is what would hold the screws on which the sign would later hang.
Then he held the sign up while I marked out where the sign would need to go and then I went to work thinking backwards where the hooks would need to go. (This is when the trim got black marks on it from the stain on the back - my husband has a recent shoulder injury and holding it up had to be quick - so the trim needs re-painted but no biggie.) By this time, I was able to go back to work on the sign itself which meant it was time for distressing. I took 220 grit sandpaper over the entire thing with my electric sander. It was now ready for the stencil.I created my own window valance sign stencil based on some bathroom signs I liked and printed.
The more I accomplished with this project, the more excited I got! Since I already had added the hooks on the back in the spots I had measured, all I had to do was the painting. All that would need done after that would be hanging it up! So, once the stencil was painted, I measured out some grainsack stripes on each side to finish it off.My son wanted to help at this point (that's another way of saying he didn't want to go to bed), so he did a little touch up for me!Ta-da!
Here it is! With the exception of the fact that the trim now needs touched up again under the sign from us trying to position it just right, I just love it. It completes this space, gives me my touch of farmhouse and character, hides the blind and makes a statement as you enter the room. I've got some photos in both natural light as well as with the lights on...
Stay tuned for the rest of this project and make sure to follow me on Facebook and Instagram in the meantime! Have you ever used a sign as a window treatment? This is our second one - we also have one over our kitchen sink. But this bathroom one is one of my all time favorites! Do YOU and make your home matter to YOU! In other words, if it makes you happy, then who cares if anyone else likes it? Have a great week, everyone.
6 comments
I absolutely love this idea!!!
Are you selling them as well??
Laura, that was the perfect valance for above your bath tub.
Love it!!!
Sooooo cool! Congratulations
Am totally in love with it and want to do one in my bathroom now and may even do one in my room where the t.v. is never did like my blinds ,love this idea.Thank you