
How to Transfer a Recipe onto Wood
Have you ever wondered how to transfer a recipe or special saying onto a piece of wood? In light of all recommended social distancing right now, this might be something for which you already have the materials. My friend had a special request for a unique gift she could give her mother-in-law that incorporates a hand-written recipe. What better background for this than one of our cutting board cookbook holder backgrounds from our January 2020 BOXED UP subscription box! This week, I'm going to take you through the steps of how to do this on something similar. Here is the paper with which we started. There was really nothing much to eliminate in the background and the lines are considered like text or writing to the scanner.

Darcey, my assistant, found an app called CamScanner that allows her to scan an image or document and create a whiter background. For instance, if the recipe was on an actual recipe index card, she could remove say, a floral pattern on the background.
You'll need to place your paper facing down on the wood, so you'll need it to be printed in the mirror image so that, when you lay it down face down, it looks "normal." I do not have a laser printer, nor do I have the ability to print in mirror image, so I took the scanned recipe to Staples and had them print for me. You'll also want to print on 20lb paper which (so I'm told) is the lightest weight paper available. Make sure your paper is cut exactly to what you want to show on the wood. If you have any marks in the margins that you don't want to be on the wood, make sure to cut those out.
I forgot to take a photo of this step when I was doing the actual cutting board project. So, instead, I grabbed a piece of scrap wood that was already stained and am showing you on that. (By the way, I did stain my cutting board prior to doing anything else.) Don't apply too little of the Mod Podge and not too much. Too much could cause your paper to rip once you apply it. But, too little could cause it not to stick enough.

Lay the paper writing side down onto the wood and press it down with your hands and a credit card or squeegee. Make sure to smooth out all bubbles. Anywhere that there is a bubble means that the design will be missing in that spot once you do the upcoming step.


Allow your paper to dry on the Mod Podge for 24-72 hours. I let mine dry for two and a half days. Here is where I remembered to start taking photos...

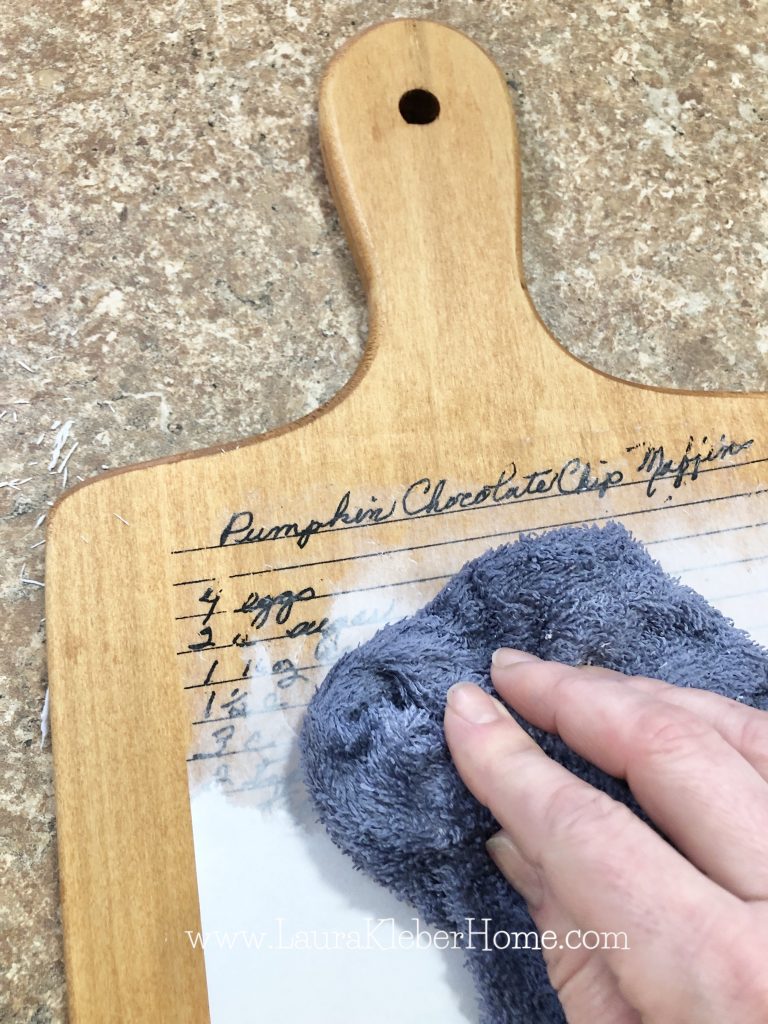
You need it to be wet but not soaking. Working in one section at a time, allow the damp rag to wet the section enough that you can start rubbing away the paper gently with your finger. You want it to be wet enought that it peels away in layers.
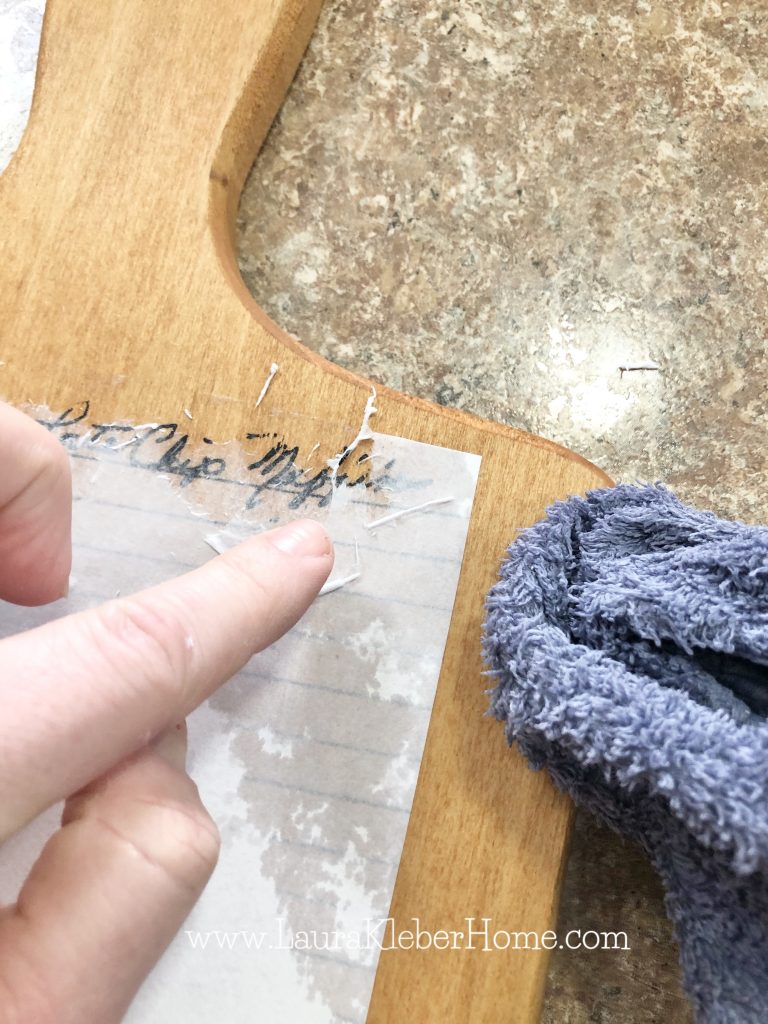

If it's not wet enough, you could pull the paper off in full chunks which could pull the writing off as well. That happened to me in a few spots, like on the very last word (which was supposed to be "rack"). I didn't panic. It was just a reminder that I needed dampen it a little more and slow down.

It took almost two full hours for me to remove the paper from the wood! Once I got to the bottom, I went back up with a slightly more damp rag and went over it all again, gently. It will be worth it for my friend who thinks the recipient will love it. And the mistakes kind of add to the charm and vintage appeal... at least I think so!
Finally, I did add 2-3 coats of Mod Podge (the same one I used to adhere the paper at the beginning) as a sealer. I brushed on thin coats and allowed dry time in between. You could also use something like Minwax's Polycrylic (available at lots of big box stores). It comes in several sheens. The higher the sheen, the more wipeable the finish is for cleaning.
Do you have a recipe or special note with which you'd like to try this? Have you done this before? Let me know - I'd love to see the final result!


Use an app to create as clean of a background as possible.
Darcey, my assistant, found an app called CamScanner that allows her to scan an image or document and create a whiter background. For instance, if the recipe was on an actual recipe index card, she could remove say, a floral pattern on the background.
Print your recipe as the "mirror image" and on a laser printer.
You'll need to place your paper facing down on the wood, so you'll need it to be printed in the mirror image so that, when you lay it down face down, it looks "normal."
I do not have a laser printer, nor do I have the ability to print in mirror image, so I took the scanned recipe to Staples and had them print for me. You'll also want to print on 20lb paper which (so I'm told) is the lightest weight paper available. Make sure your paper is cut exactly to what you want to show on the wood. If you have any marks in the margins that you don't want to be on the wood, make sure to cut those out. Apply a medium layer of Mod Podge to the wood.
I forgot to take a photo of this step when I was doing the actual cutting board project. So, instead, I grabbed a piece of scrap wood that was already stained and am showing you on that. (By the way, I did stain my cutting board prior to doing anything else.) Don't apply too little of the Mod Podge and not too much. Too much could cause your paper to rip once you apply it. But, too little could cause it not to stick enough.
Lay your paper onto the wood over the Mod Podge.
Lay the paper writing side down onto the wood and press it down with your hands and a credit card or squeegee. Make sure to smooth out all bubbles. Anywhere that there is a bubble means that the design will be missing in that spot once you do the upcoming step.
Allow your paper to dry on the Mod Podge for 24-72 hours. I let mine dry for two and a half days. Here is where I remembered to start taking photos...
Dampen a rag thouroughly and ring it out (almost completely).
You need it to be wet but not soaking. Working in one section at a time, allow the damp rag to wet the section enough that you can start rubbing away the paper gently with your finger. You want it to be wet enought that it peels away in layers.
If it's not wet enough, you could pull the paper off in full chunks which could pull the writing off as well. That happened to me in a few spots, like on the very last word (which was supposed to be "rack"). I didn't panic. It was just a reminder that I needed dampen it a little more and slow down.
It took almost two full hours for me to remove the paper from the wood! Once I got to the bottom, I went back up with a slightly more damp rag and went over it all again, gently. It will be worth it for my friend who thinks the recipient will love it. And the mistakes kind of add to the charm and vintage appeal... at least I think so!
Finally, I did add 2-3 coats of Mod Podge (the same one I used to adhere the paper at the beginning) as a sealer. I brushed on thin coats and allowed dry time in between. You could also use something like Minwax's Polycrylic (available at lots of big box stores). It comes in several sheens. The higher the sheen, the more wipeable the finish is for cleaning.
Do you have a recipe or special note with which you'd like to try this? Have you done this before? Let me know - I'd love to see the final result!
26 comments
Great idea! Is the Mod Podge the Photo Transfer or just regular Mod Podge?
Hi! I was reading all the comments here, Could I do the same think with a picture as you have with your recipe?
Hi, I did to boards. I let them sit for a week before I could get to them. After several trys, it is still very cloudy. Any tips? Or, should I start new? This is a very special Birthday gift for my daughter. The board was made by her grandfather and the recipe was her grandmother’s. They both past on recently. My daughter was very very close to them and I know how much these would mean to her. Hope you can help. Thank you, Sandy
I tried this a couple of times but the print was wearing off as I removed the modge podge. Any advice?
Laura – Have you tried copying onto clear copy plastic made for printers? You can save the Staples step by just turning it around to read backwards and then copying it again. Have done this for inserts in various things, and it works well.
-M