
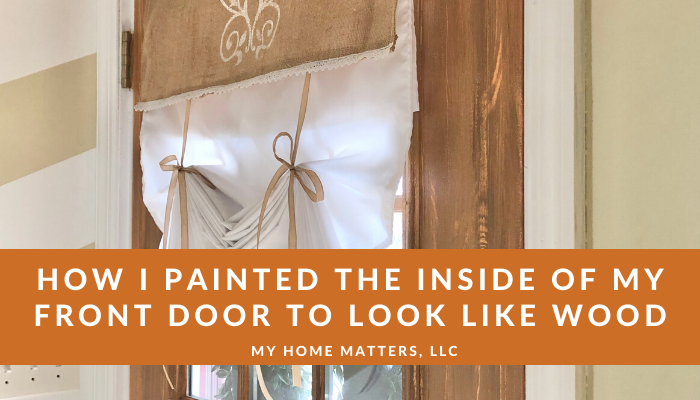
How I Got the Look of a Wooden Front Door
Do you love the look of a wooden front door? I do! My dream front door is wooden with three quarter glass. It would be just dreamy to me! But really any wooden door is tops in my book. Here are a couple I really love.
***This post contains affiliate links which means if you click on a link and decide to purchase that item, I will get a small commission. However it comes at no additional cost to you. Feel free to read my full Privacy Notice.***
From French Blue Cottage

I love the glass on this one I found on Pinterest, although I don't know the original source of this photo.

But we cannot afford a new door, let alone a wooden door SOOOO, DIY it is to the rescue again! Here's a before look at our plain white door.
I’m going to give you a quick run down of how I made our metal front door look like wood with some paint and tools. It’s a little like how I did our beams in last week’s post EXCEPT that I did not use wax.
While it is absolutely NO fun, taping off is something that just needed to be done! When it was all said and done, it was well worth it. And, to be quite honest, I had wished prior to this project that we had purchased a door that had the mullions inside the glass. Cleaning is so much simpler on those (our kitchen door has them inside). However, now that I've done this with the mullions, I wish we had them on the outside of the back door also (so that I can paint it the same way)!
Secondly, I painted the entire door and mullions in the same orangish-yellow that I painted the beams last week. Okay, it appears this is a small lie. I now see that I painted the frame of the door and THEN I taped off the mullions!
I wanted the same look of Minwax Early American stain as I did for the beams. In case you missed last week's post, the color was Valspar's Spun Gold.
In retrospect, I realize that I went overboard on the four colors. I could probably have gotten away with just two colors because when I was done with the entire project, the paint looked like it hadn't been touched. I could do about 50 more doors with these!
I let it be heavier in some areas and lighter in others and practically dry in others. I continued this process with each of the four colors, ending with the darkest brown. The darkest brown is the one I played with the most in terms of trying to make it look aged. In fact, speaking of "aged," I had purchased some antiquing glaze from Lowe's to use after all of the browns went on but I didn't feel like it was needed, so I returned it.


However, I noticed that the paint was drying much more quickly than I expected so the drier spots were not allowing the graining tool to do it's job as well as it did in others. I was a little bummed that I didn't think of this earlier, but I didn't want to start the process over and I didn't want to just scratch through the paint by pushing harder on the top layers. That would not give the effect I wanted.
After tweaking the colors a bit with a little of all four browns, I was done. I removed the painter's tape by first scoring it with a knife. Boom! I felt like I was staring a wooden front door!
Here's a look from the next morning...

Overall, I'm super happy with it and, once again, it adds so much more warmth to the space. Since the time these photos were taken, I have primed and painted my entry wall and removed the chevron stripes! In fact, since this post is a day late, I've already gotten my peel and stick shiplap wallpaper up! Did you see my post on Insta and Facebook today? Here is what it looked like when I was mid-priming. (By the way, getting rid of these stripes was a PAIN IN THE REAR END!) I loved them when they were hot, but now that it's the year of simplification, I'm toning it down. The "wooden beams" and front door need to shine without competing with those wild stripes!
If I forgot to mention, these projects spiral from one project into the next. Once I got the "wooden front door" done, I decided it was time to bite the bullet and paint the main level of the house (not shown in these photos... YET). If I was already planning to change out the entry way wall, then I might as well go all in. I never was 100% happy with my paint color on this level and finally found one I am loving! Sherwin Williams Believable Buff is now becoming SW Bungalow Beige. Our whole main level is open, so it's kind of a lot of painting. One room flows into the next: Hallway, Entry, Living, Kitchen, Dining, and Kids' Cubby Area...so I still have about half of all of that left to paint. Slowly, but surely, it's coming together!


If you are following my stories on social, this space seems to look different by the day around here! I definitely intend to do the outside of the door when the weather breaks. And, I'm torn on whether to do our back door (kitchen door) but that door has the mullions on the inside of the glass. I don't know if it will look right if I just paint the outer frame and can't do the mullions. What do you think - to paint or not to paint (like wood)? I hope you'll come back next week to learn more about my peel and stick wallpaper! If I can do it, so can you!
***This post contains affiliate links which means if you click on a link and decide to purchase that item, I will get a small commission. However it comes at no additional cost to you. Feel free to read my full Privacy Notice.***
From French Blue Cottage
I love the glass on this one I found on Pinterest, although I don't know the original source of this photo.
But we cannot afford a new door, let alone a wooden door SOOOO, DIY it is to the rescue again! Here's a before look at our plain white door.
I’m going to give you a quick run down of how I made our metal front door look like wood with some paint and tools. It’s a little like how I did our beams in last week’s post EXCEPT that I did not use wax.
First, I taped off the darn mullions.
While it is absolutely NO fun, taping off is something that just needed to be done! When it was all said and done, it was well worth it. And, to be quite honest, I had wished prior to this project that we had purchased a door that had the mullions inside the glass. Cleaning is so much simpler on those (our kitchen door has them inside). However, now that I've done this with the mullions, I wish we had them on the outside of the back door also (so that I can paint it the same way)!
Secondly, I painted the entire door and mullions in the same orangish-yellow that I painted the beams last week. Okay, it appears this is a small lie. I now see that I painted the frame of the door and THEN I taped off the mullions!
I wanted the same look of Minwax Early American stain as I did for the beams. In case you missed last week's post, the color was Valspar's Spun Gold.
In retrospect, I realize that I went overboard on the four colors. I could probably have gotten away with just two colors because when I was done with the entire project, the paint looked like it hadn't been touched. I could do about 50 more doors with these!
Once the base coat was dry, I took a chip brush and dipped into the lightest color and started to randomly dry brush or streak some on in spots.
I let it be heavier in some areas and lighter in others and practically dry in others. I continued this process with each of the four colors, ending with the darkest brown. The darkest brown is the one I played with the most in terms of trying to make it look aged. In fact, speaking of "aged," I had purchased some antiquing glaze from Lowe's to use after all of the browns went on but I didn't feel like it was needed, so I returned it.
I took my graining tool and, like I did last week, ran it through a section at a time, rocking it back and forth to create a random grain pattern.
However, I noticed that the paint was drying much more quickly than I expected so the drier spots were not allowing the graining tool to do it's job as well as it did in others. I was a little bummed that I didn't think of this earlier, but I didn't want to start the process over and I didn't want to just scratch through the paint by pushing harder on the top layers. That would not give the effect I wanted.
Stepping back and checked it all out allowed me to evaluate my progress.
After tweaking the colors a bit with a little of all four browns, I was done. I removed the painter's tape by first scoring it with a knife. Boom! I felt like I was staring a wooden front door!
Here's a look from the next morning...
Overall, I'm super happy with it and, once again, it adds so much more warmth to the space. Since the time these photos were taken, I have primed and painted my entry wall and removed the chevron stripes! In fact, since this post is a day late, I've already gotten my peel and stick shiplap wallpaper up! Did you see my post on Insta and Facebook today? Here is what it looked like when I was mid-priming. (By the way, getting rid of these stripes was a PAIN IN THE REAR END!) I loved them when they were hot, but now that it's the year of simplification, I'm toning it down. The "wooden beams" and front door need to shine without competing with those wild stripes!
Final photos before moving on to next week's wallpaper episode.
If I forgot to mention, these projects spiral from one project into the next. Once I got the "wooden front door" done, I decided it was time to bite the bullet and paint the main level of the house (not shown in these photos... YET). If I was already planning to change out the entry way wall, then I might as well go all in. I never was 100% happy with my paint color on this level and finally found one I am loving! Sherwin Williams Believable Buff is now becoming SW Bungalow Beige. Our whole main level is open, so it's kind of a lot of painting. One room flows into the next: Hallway, Entry, Living, Kitchen, Dining, and Kids' Cubby Area...so I still have about half of all of that left to paint. Slowly, but surely, it's coming together!
If you are following my stories on social, this space seems to look different by the day around here! I definitely intend to do the outside of the door when the weather breaks. And, I'm torn on whether to do our back door (kitchen door) but that door has the mullions on the inside of the glass. I don't know if it will look right if I just paint the outer frame and can't do the mullions. What do you think - to paint or not to paint (like wood)? I hope you'll come back next week to learn more about my peel and stick wallpaper! If I can do it, so can you!
3 comments
What were the other three colors that you used?
Just wondering if all the paint you used for this project was Matte finish. Also, would you do sections at a time with the paint since it dried to fast? One more question…did you let all but the darkest brown paint dry before using the graining tool?
I purchased items through your links…I hope you benefit from that!!!!
Such a cool idea. I love reading these DIY ideas.