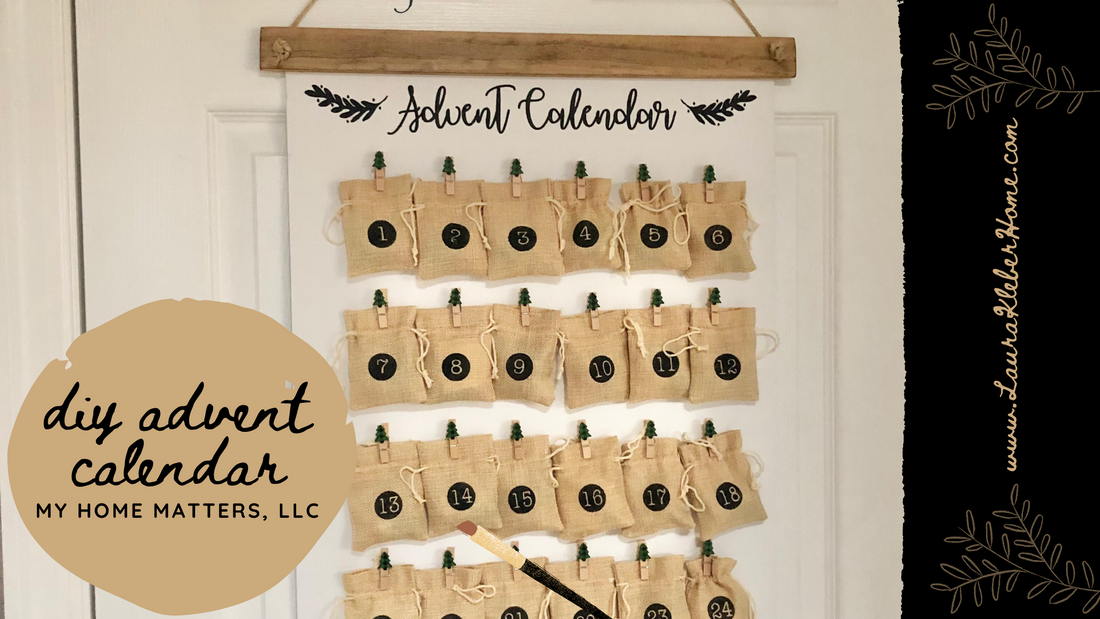
DIY Advent Calendar
Our new pantry door was calling for an advent calendar to go with our new neutral Christmas decor this year. My 16-year old daughter requested a "chocolate" advent calendar and, of course, that sent my wheels turning. I figured the pantry door would be the perfect spot. So, I grabbed some supplies that I already had plus I ordered these little burlap sacks, made a quick stencil and went to work.
Lay everything for your advent calendar out on your canvas so that you have a plan in mind. The only thing I wish I would have planned out that I did not was marking a straight line across each row to show where the clothes pins should line up. (I kind of winged this part and, as a result, my clothespins are not lined up and not evenly spaced.) You could lay them out in a tree shape if you want, I did not have enough room to do this on mine.
Glue on your clothes pins with hot glue. I got my clothespins in Target's Dollar Spot. However, it's been at least a year since doing so. I tend to grab clothes pins whenever I see some cute or festive ones and tuck them away. You never know when you could use them! As I said above, it would be wise to mark some very small pencil lines on each side of the canvas and then you could use painter's tape to form a line across so that you can line up the pins evenly. I am kicking myself for not doing this one simple step!
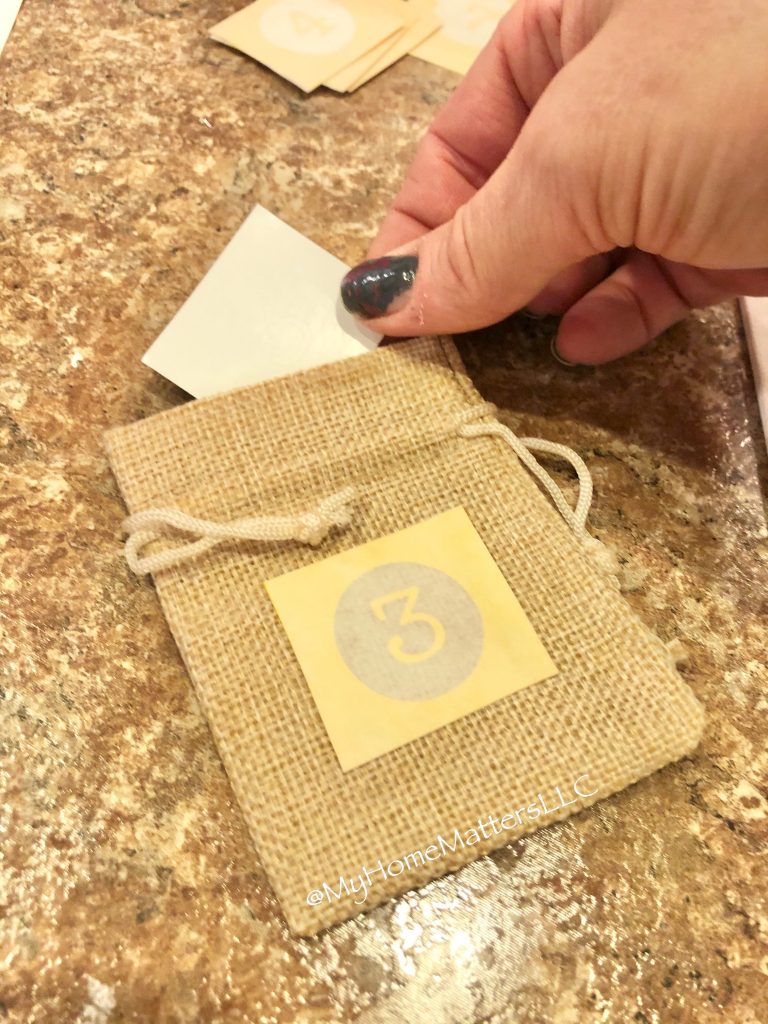
Stencil the numbers onto your little burlap sacks and paint the title on at the top. When you do the numbers, I always put the stencil backing inside the sack so as to prevent the paint from bleeding all the way through to the other side. Be sure to leave an inch or so of margin at the top and bottom for the pieces of trim that will be added later.


Cut your trim pieces (I get craft board at Lowe's - these pieces are about 1.5 inches wide and 1/4 inch thick. I cut mine to 19.5 inches so that there is a bit over overhang past the canvas on which it will rest. Drill a hole in each end of one of the trim boards (this will be your top board). You want to be sure to drill the hold far enough out that it will clear the canvas but not so far that it will split the wood at the end. Stain or paint your trim pieces and let them dry. Use hot glue to glue the back of the trim pieces to the canvas. Note to self: Hot glue is not enough to hold the weight for the top piece. (I hung this and about 4 hours later it was all on the floor as the top trim piece came apart from the rest and the entire thing came crashing down.)
After that debacle, I ended up stapling both top and bottom pieces after the glue dried from the back. I used 3/8 inch staples and my pneumatic stapler but I'm sure a heavy duty hand stapler would do as well. Insert the twine from behind and knot the twine so that it will not come back through. Adjust the twine as needed for your space. And that's it!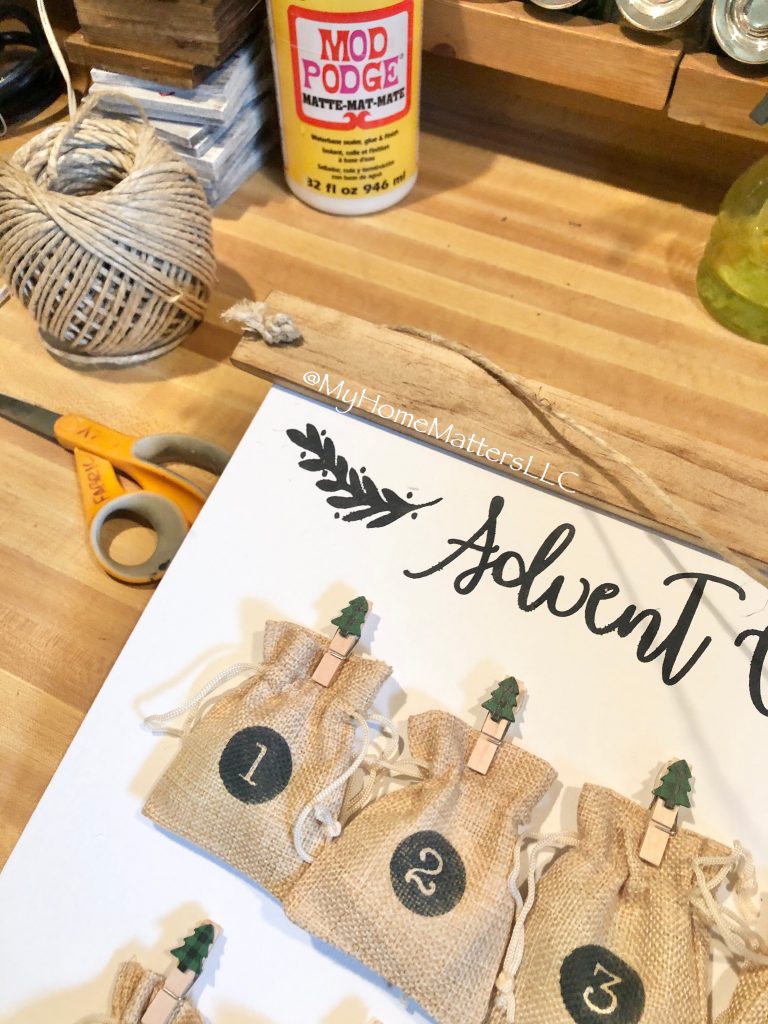
You can take some white paint and touch up any paint that bled through the stencil. We chose to use Hershey's kisses for our advent calendar because three fit just fine in the little sacks. The Christmas bags of kisses came with red, silver and green so that each of our three kids knows who has already had their "kiss" of the day. I had the little good deed notes (laminated from a prior advent calendar) and added them in the sacs.
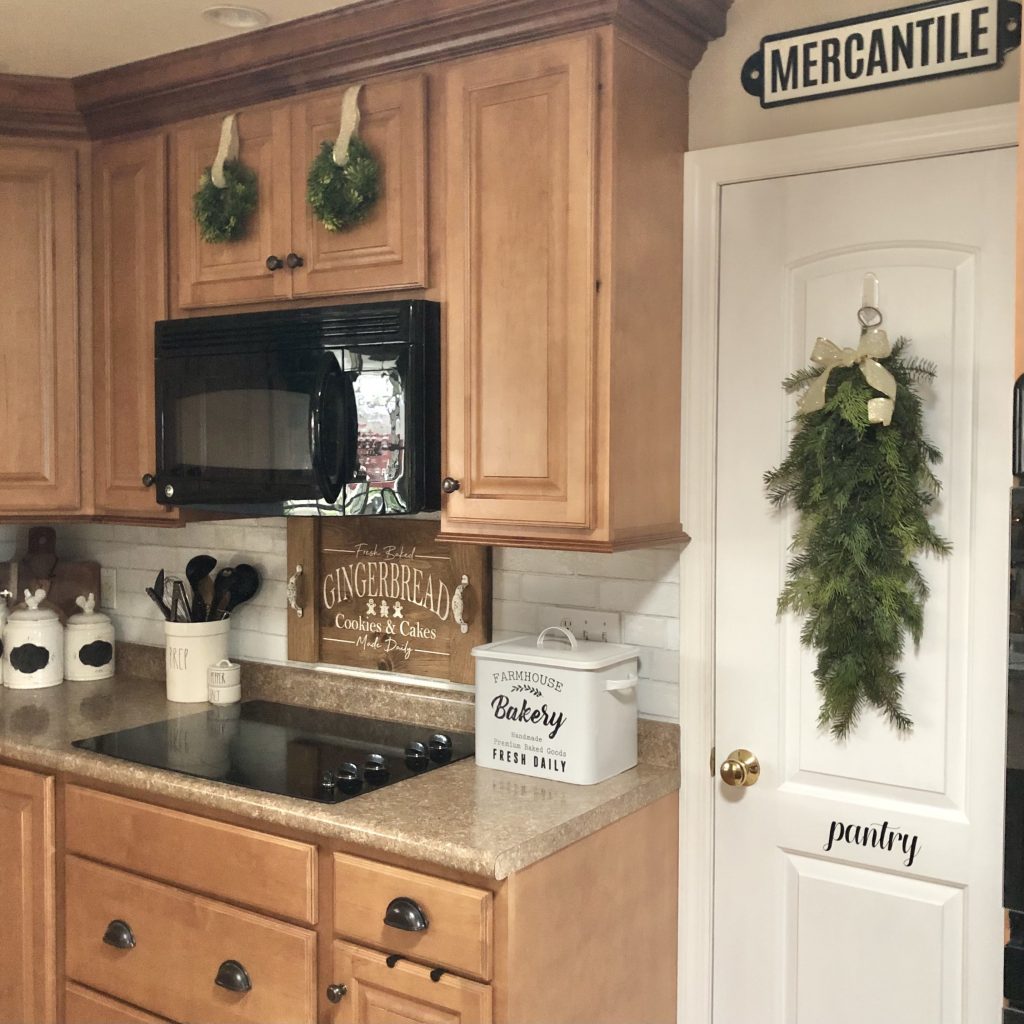
Turns out, our basement stairwell door (also in the kitchen) was calling out more loudly than the pantry door for this calendar! So the louder door won! Here it is in place as well as our pantry door which got a softer green cedar drop instead.

And that Gingerbread Tray Kit is brand new and available in the shop, by the way! Have you ever made an Advent Calendar? Inquiring (and creative) minds want to know!

Supplies:
- Canvas Background (mine is 18x24)
- Wood trim pieces for top and bottom
- Twine for hanging
- Stencils in desired wording and numbers
- Festive (or not) small clothes pins (I got mine from Target's Dollar Spot)
- Small burlap sacks
- Hot glue gun
- Staples (length depends on thickness of trim pieces and canvas; I used 3/8")
- Paint/brush
- Stain
- Candy or other treats or cards with special things to do each day

Step 1:
Lay everything for your advent calendar out on your canvas so that you have a plan in mind. The only thing I wish I would have planned out that I did not was marking a straight line across each row to show where the clothes pins should line up. (I kind of winged this part and, as a result, my clothespins are not lined up and not evenly spaced.) You could lay them out in a tree shape if you want, I did not have enough room to do this on mine.
Step 2:
Glue on your clothes pins with hot glue. I got my clothespins in Target's Dollar Spot. However, it's been at least a year since doing so. I tend to grab clothes pins whenever I see some cute or festive ones and tuck them away. You never know when you could use them! As I said above, it would be wise to mark some very small pencil lines on each side of the canvas and then you could use painter's tape to form a line across so that you can line up the pins evenly. I am kicking myself for not doing this one simple step!
Step 3:
Stencil the numbers onto your little burlap sacks and paint the title on at the top. When you do the numbers, I always put the stencil backing inside the sack so as to prevent the paint from bleeding all the way through to the other side. Be sure to leave an inch or so of margin at the top and bottom for the pieces of trim that will be added later.
Step 4:
Cut your trim pieces (I get craft board at Lowe's - these pieces are about 1.5 inches wide and 1/4 inch thick. I cut mine to 19.5 inches so that there is a bit over overhang past the canvas on which it will rest. Drill a hole in each end of one of the trim boards (this will be your top board). You want to be sure to drill the hold far enough out that it will clear the canvas but not so far that it will split the wood at the end. Stain or paint your trim pieces and let them dry. Use hot glue to glue the back of the trim pieces to the canvas. Note to self: Hot glue is not enough to hold the weight for the top piece. (I hung this and about 4 hours later it was all on the floor as the top trim piece came apart from the rest and the entire thing came crashing down.)
After that debacle, I ended up stapling both top and bottom pieces after the glue dried from the back. I used 3/8 inch staples and my pneumatic stapler but I'm sure a heavy duty hand stapler would do as well. Insert the twine from behind and knot the twine so that it will not come back through. Adjust the twine as needed for your space. And that's it!
Final details...
You can take some white paint and touch up any paint that bled through the stencil. We chose to use Hershey's kisses for our advent calendar because three fit just fine in the little sacks. The Christmas bags of kisses came with red, silver and green so that each of our three kids knows who has already had their "kiss" of the day. I had the little good deed notes (laminated from a prior advent calendar) and added them in the sacs.
Turns out, our basement stairwell door (also in the kitchen) was calling out more loudly than the pantry door for this calendar! So the louder door won! Here it is in place as well as our pantry door which got a softer green cedar drop instead.
And that Gingerbread Tray Kit is brand new and available in the shop, by the way! Have you ever made an Advent Calendar? Inquiring (and creative) minds want to know!