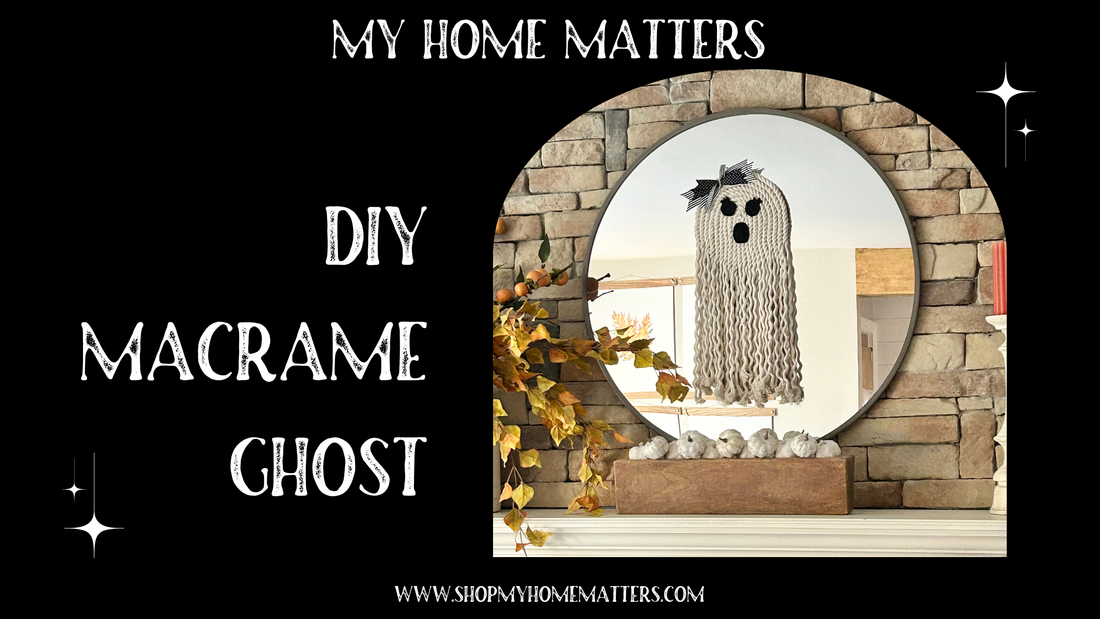
DIY Macrame Ghost
Share
DIY Macrame Ghost
Looking for a spooky-cute Halloween craft to add to your home decor? This easy macrame ghost is the perfect DIY project, and you can make it with affordable supplies from Dollar Tree! With just some nautical rope, an 8" cardboard round, and a few other materials, you’ll have a ghost that’s ready to haunt your space in no time.
Supplies Needed
- 10mm Nautical Rope (from Dollar Tree – about four packs)
- 8” Cardboard Round (or wood if you prefer)
- Black Felt (for the eyes and mouth)
- Hot Glue Gun
- Good Scissors
- Optional: Ribbons (for a cute bow, use 2-3 different ribbons)
Instructions
Prepare Your Base
Start with your 8” cardboard round. If you’re using wood, that’s great too! This round will act as the base of your macrame ghost. It’s simple and sturdy, making it easy to attach the nautical rope.
Cut and Attach the Rope
Take your 10mm nautical rope and loop it into thirds. You’ll need multiple pieces, depending on how thick and full you want your ghost to be. Once you have all your pieces cut:
- Fold each piece of rope in half and start with the folded end placed at the top of the circle. Arrange the cord to follow the outer edge of the circle. Continue doing this with each of the next pieces, working your way towards the center. Lay them all out to be sure you are happy with the look and that all of the cardboard is covered.
- Hot glue the folded end of each rope piece along the top edge of your cardboard or wood round, covering the top entirely. This will create the top of your ghost’s head and let the ropes hang down to form the body.
Shape the Ghost’s Body
With the rope securely attached, give your ghost a little trim to shape its “body.” Trim the ends to form a rounded base, giving it that classic ghostly shape. Then carefully un-twine each of the hanging pieces. My cording was 3-ply so I simply untwisted each piece into the three separate pieces. You will have some more detailed fraying at the very bottom/ends.
Create the Face
Using black felt, cut out two round shapes for the eyes and an oval for the mouth. These simple shapes are easy but will give your ghost a cute, friendly expression. Once you’ve cut the shapes, use your hot glue gun to attach them to the top center of the ghost’s head.
Add a Bow (Optional)
To add a bow, pick 2-3 different ribbons for some added flair. Layer your ribbons, cut to size, and tie them in a bow. Then, glue it right below the ghost’s face for an adorable touch.
Displaying Your Macrame Ghost
Once your ghost is complete, hang it up or prop it on a shelf to showcase your spooky creation! It’s a quick and easy way to add some Halloween spirit to your space, with minimal materials and maximum charm.


Tips
- Use Sharp Scissors: Good, sharp scissors are important when cutting thick nautical rope to get clean ends.
- Try Other Face Designs: Get creative with your ghost’s face! You could make it a little spooky or go for a more cartoonish look.
- Add Lights: Try stringing some tiny LED lights along the ghost’s body for an extra pop at night.
- Try Different Size Cords or Backgrounds Sizes: Create different size ghosts to showcase throughout your home.
- Command Picture Strips are an easy way to hang your ghost on a flat surface like a mirror.
This easy macrame ghost is a fantastic way to craft with family, friends, or just enjoy a peaceful DIY session. Happy Halloween crafting!

